/Lawcode%20Logo%20(White).svg)
To edit a filter, click on Dashboards.
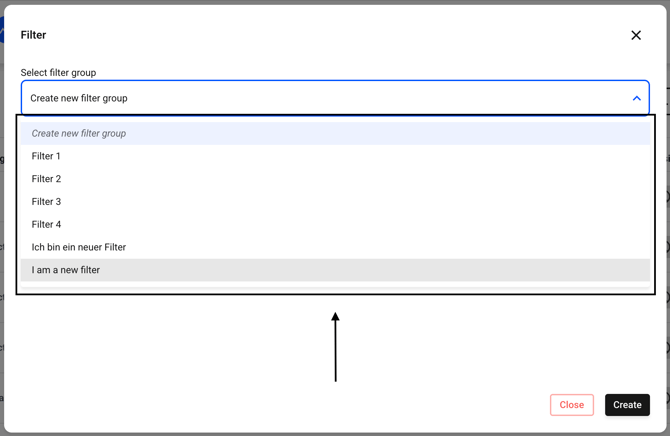
Now click on the filter button. Alternatively, you can first select a filter to the left of the button and then click on the filter button.

Now select the filter group you want to edit. To do this, click on the drop-down menu under Select filter group.

Now select the filter of your choice.
You can customize the name of the filter by editing the name of the filter group.

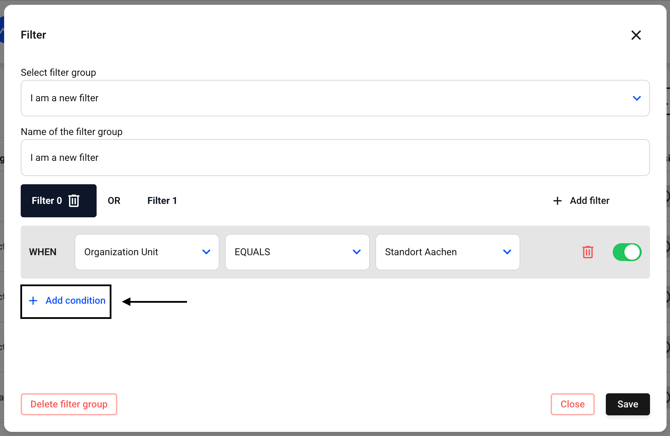
You can add further conditions to the filters you have already saved by first clicking on one of the filters.
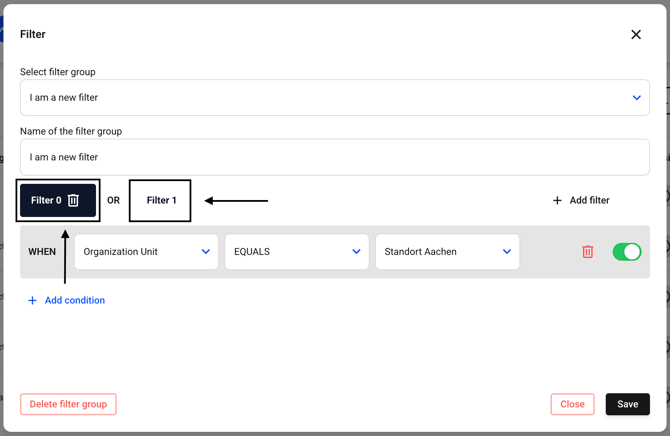
To do this, click Add condition in the respective filters.
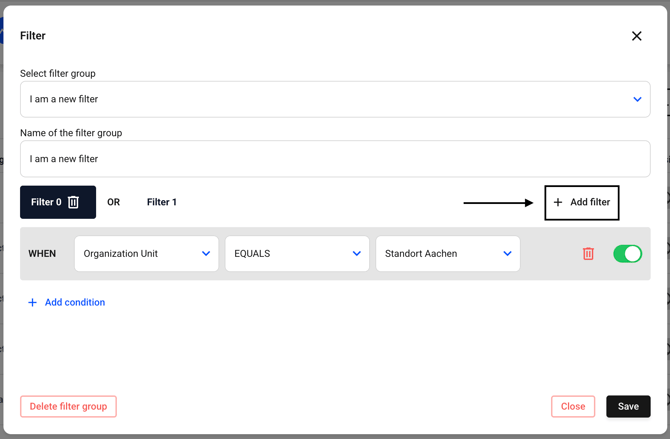
You can also add additional OR filters by clicking Add Filter.
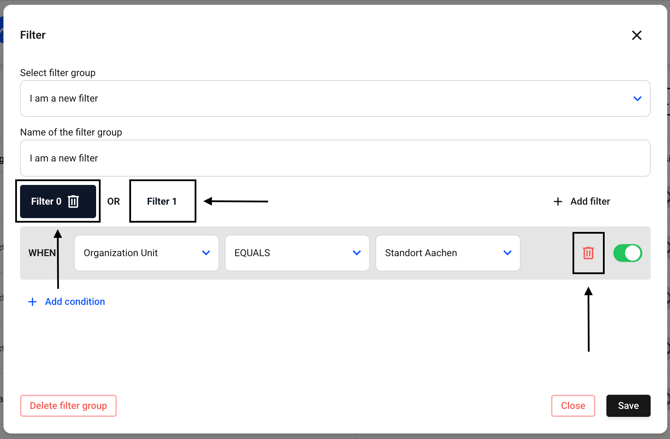
You can delete a condition within the filters by first clicking on the desired filter and then selecting the trash can in the row of the condition of your choice.
Please note that the deletion will be carried out immediately and does not require any additional confirmation. However, the changes will only take effect once you confirm the filter at the bottom right by clicking Save.
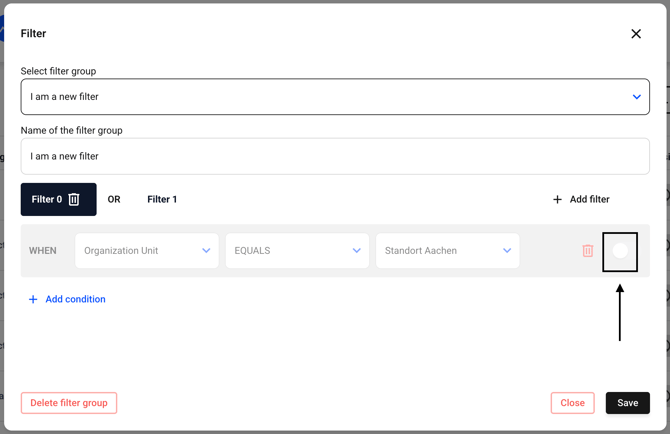
You also have the option of temporarily deactivating a condition. To do this, navigate to the filter of your choice as described above and click on the switch icon in the correct row.
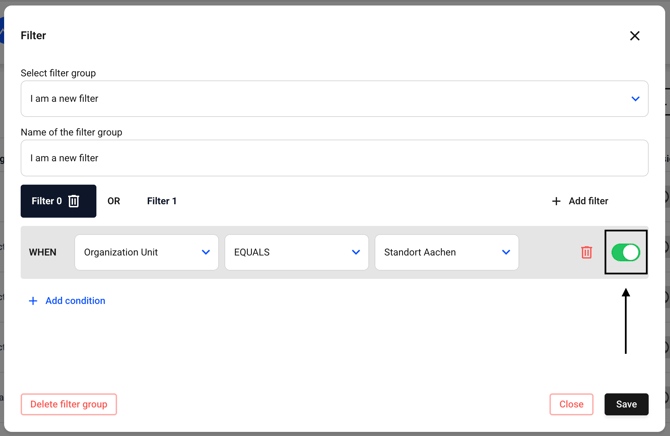
If you click on the icon again afterwards, the condition will become active again.
You can delete a filter by clicking on the trash can icon for that filter. This filter will be removed immediately without further confirmation.

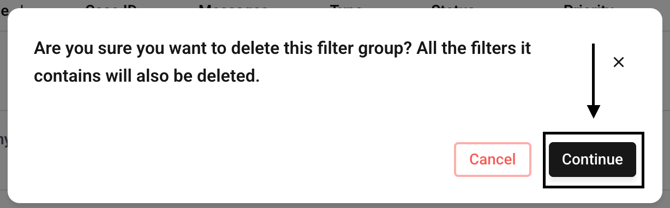
It is also possible to delete an entire filter group immediately with a single click. To do this, click on Delete filter group.
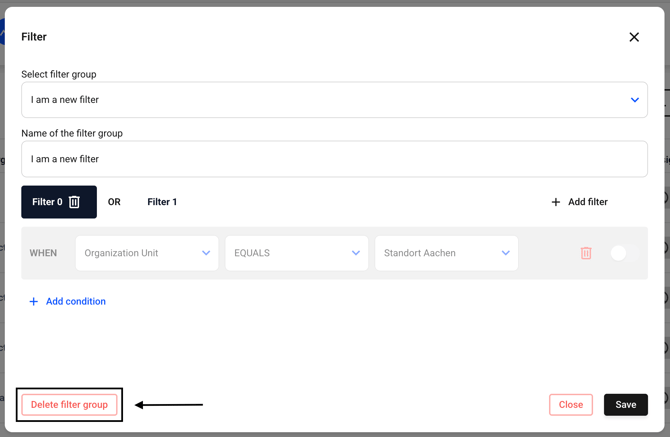
A new window will open where you must confirm the deletion. If you click Continue, the filter group will be permanently deleted.