How can I edit a supplier?
In this chapter we will explain how to edit a supplier.
To edit suppliers, navigate to the (direct) suppliers.
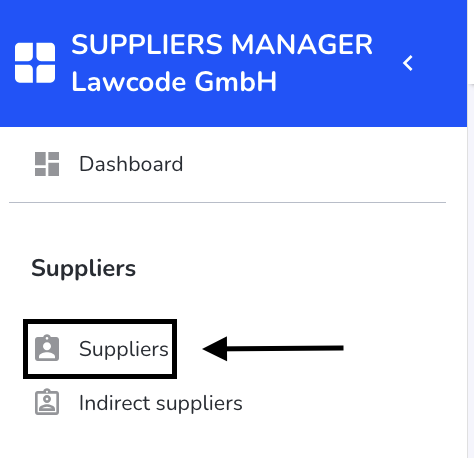
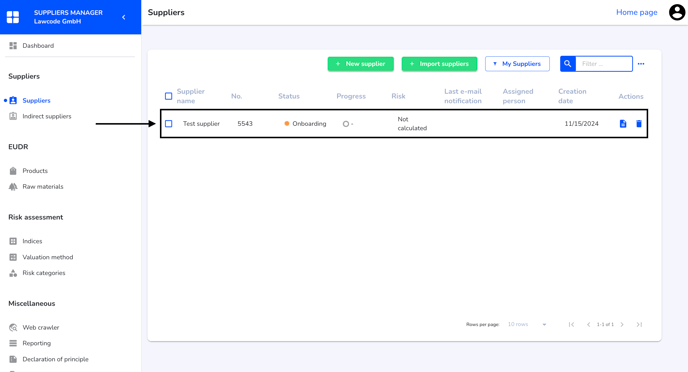
Select a supplier and click on it.
You will see the following overview and can edit various things for a supplier.
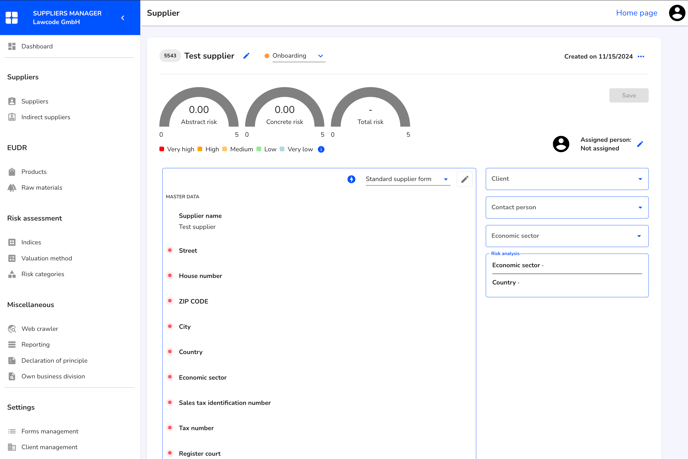
Supplier ID
Each supplier is assigned an ID by the system, which cannot be changed.

Change supplier name
Each supplier has a name that can be customized.

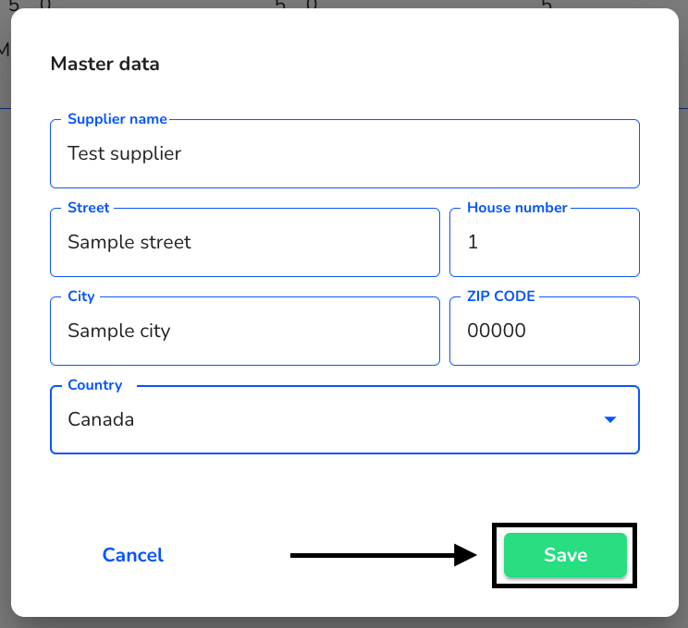
Click on the editing pencil to open the following dialog in which you can enter the master data for the supplier name.
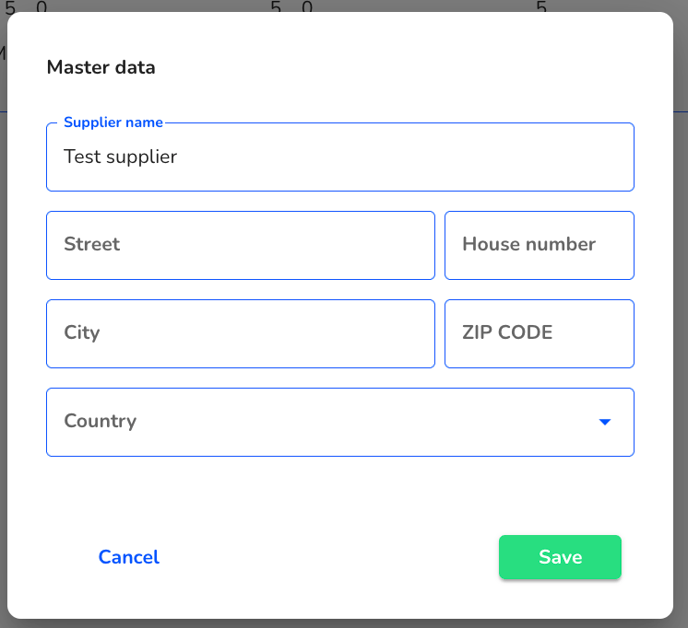
The changes must be confirmed by clicking on Save in the dialog.
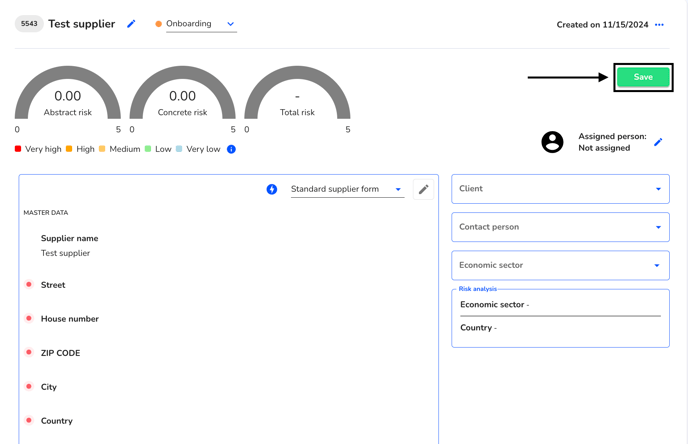
The change must also be saved at the supplier.
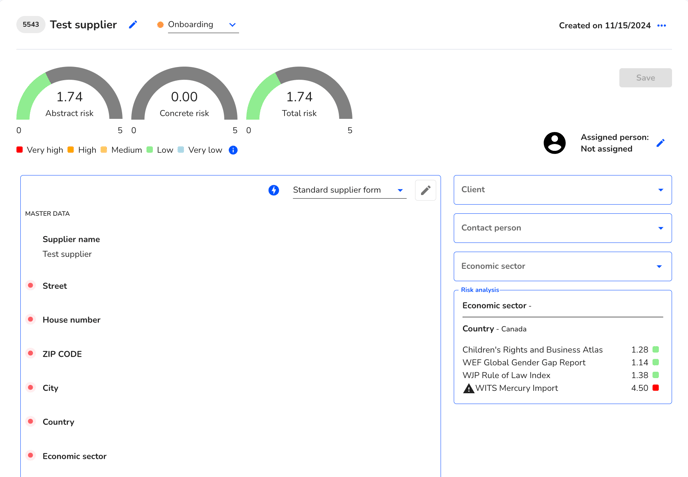
The master data is now stored at the supplier.
Change of status
The status of a supplier can be changed at any time. To do so, click on the status of the supplier.

Select the desired status.

Save the change to the supplier.

Creation date Supplier
A creation date is stored for each supplier. This cannot be changed.

Convert supplier to indirect supplier
Each supplier can be converted to an indirect supplier and vice versa. To do this, click on the three dots.

In the next step, click on Convert to indirect (or direct) supplier.

The supplier is now an indirect supplier.
Assigned person
An internal user can be assigned to each supplier, who is then primarily responsible for processing. To do this, click on the editing pencil.

A dialog opens in which an assigned person can be selected. Click on this person.
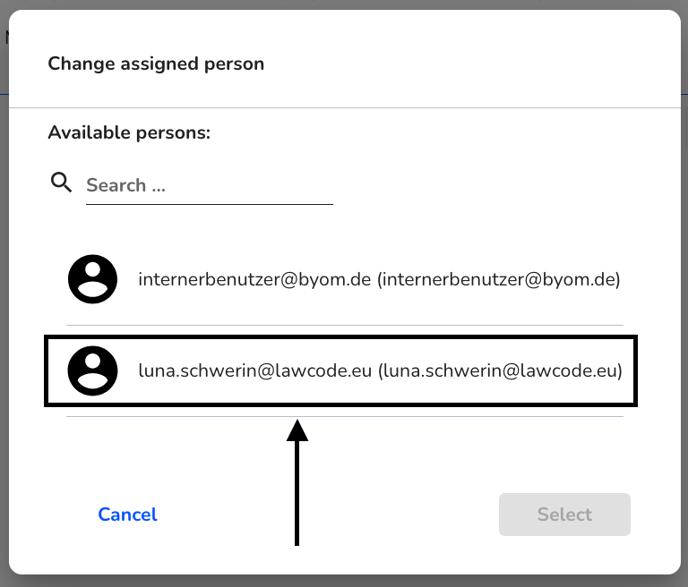
Confirm the assigned person with the “Select” button.
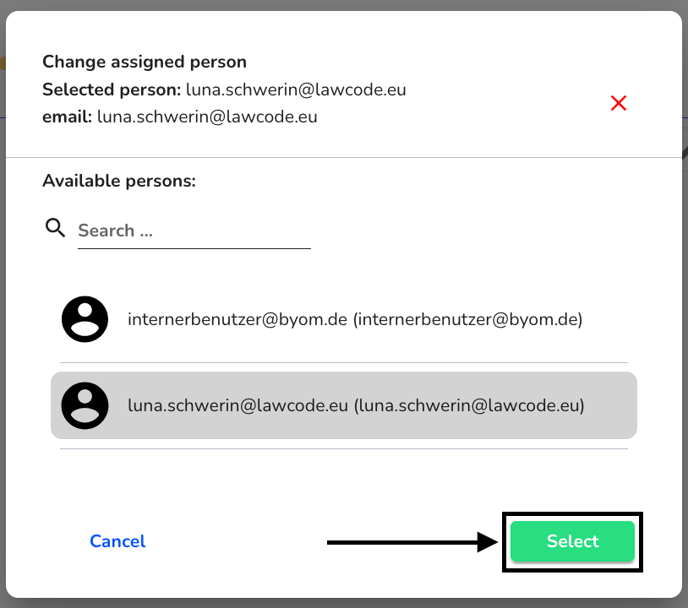
Confirm your change by saving the supplier.

Supplier master data
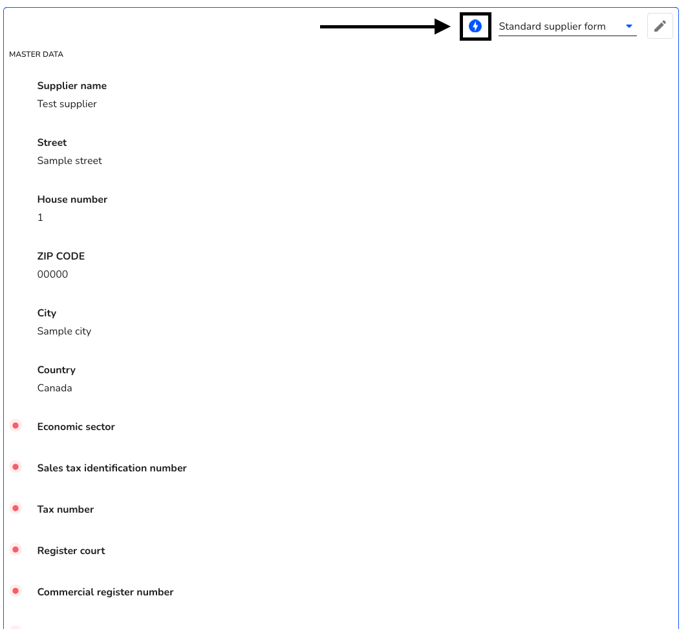
The “Standard supplier form”, which is used to record master data, is automatically stored for each supplier. This or other forms can be completed and a risk assessment can be carried out. You can see the overview here.
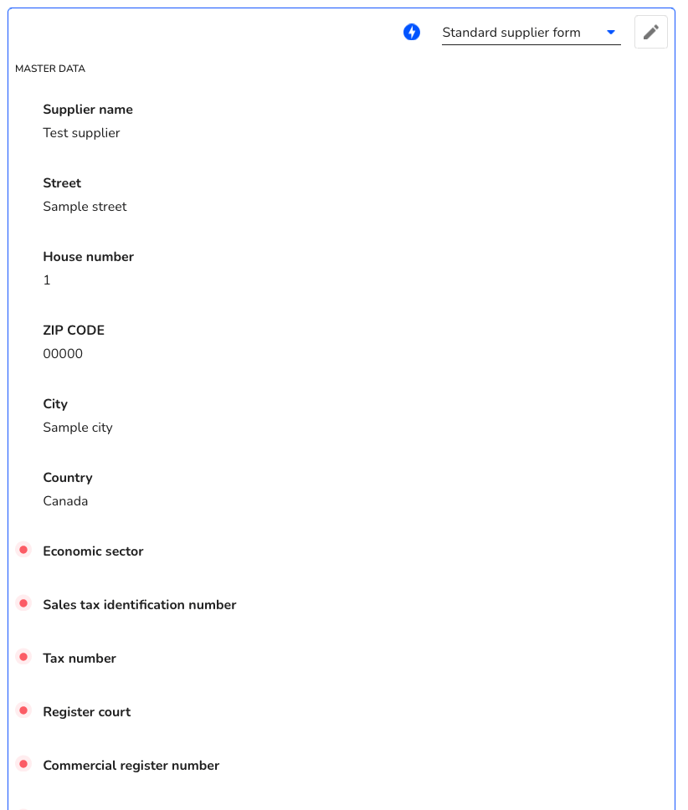
A risk assessment can be made by clicking on the lightning bolt.
A risk value is determined with the help of the probability of occurrence and the damage potential.
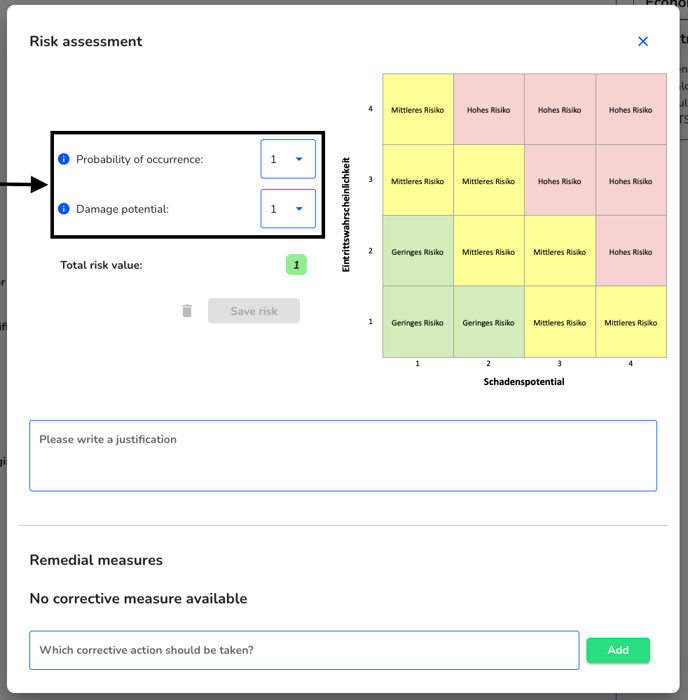
The risk assessment must be confirmed by clicking on “Save risk”.
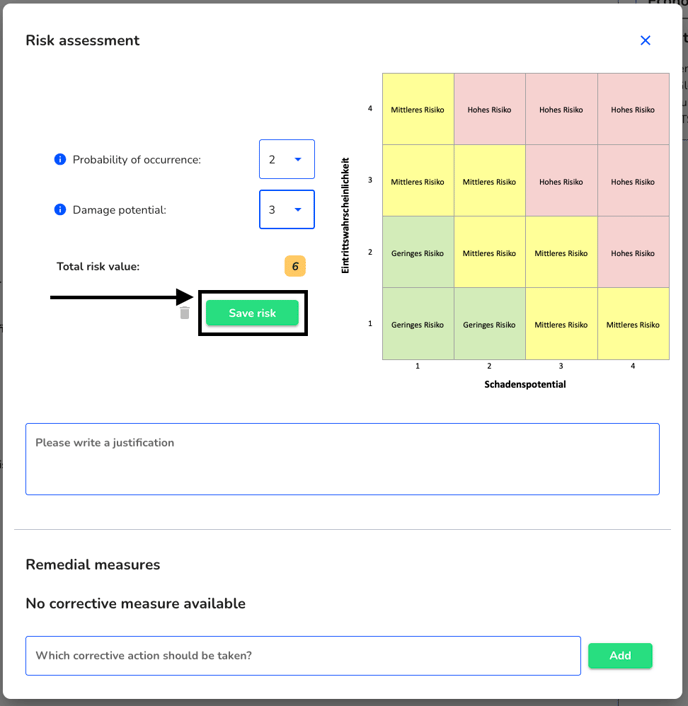
It is possible to write a justification.
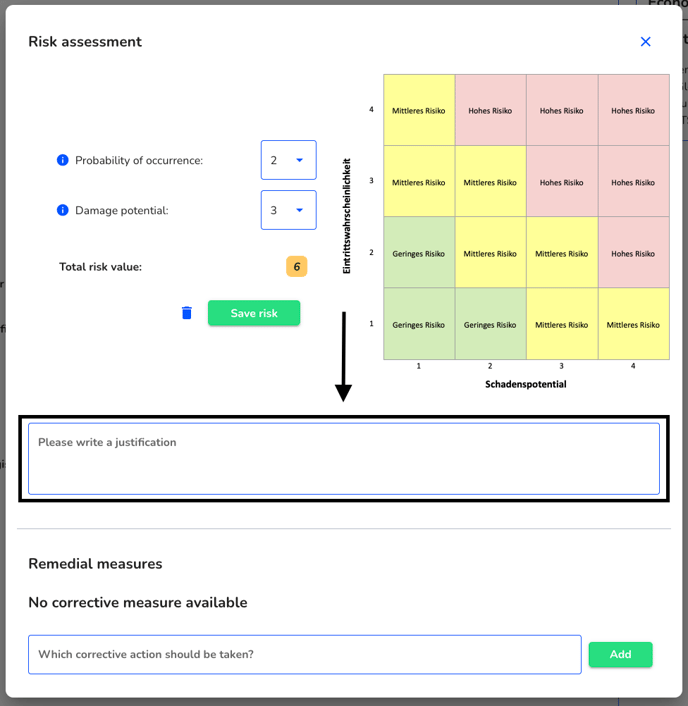
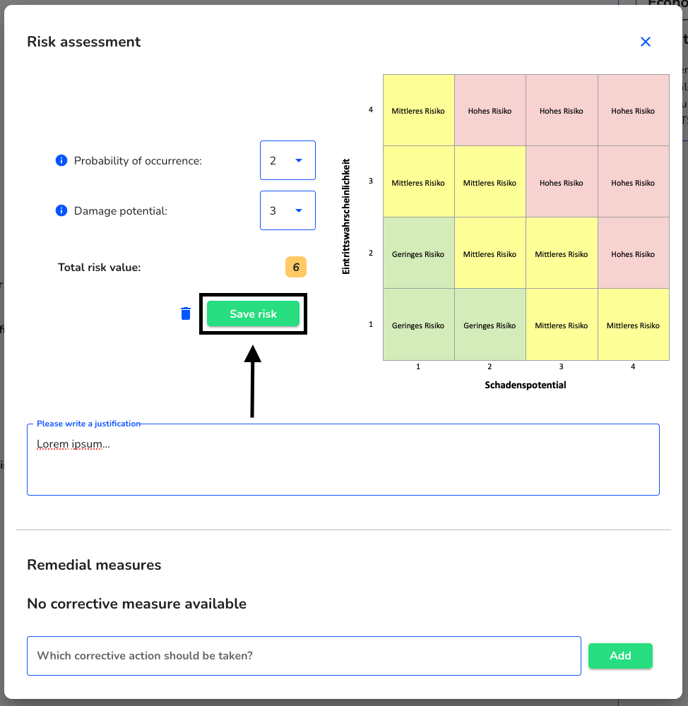
This must then also be saved by clicking on “Save risk”.
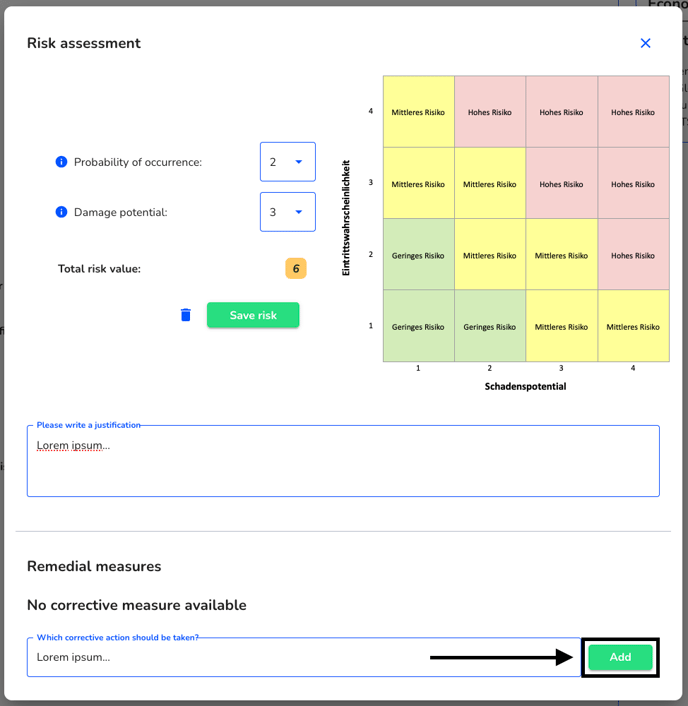
Remedial measures can also be defined directly.
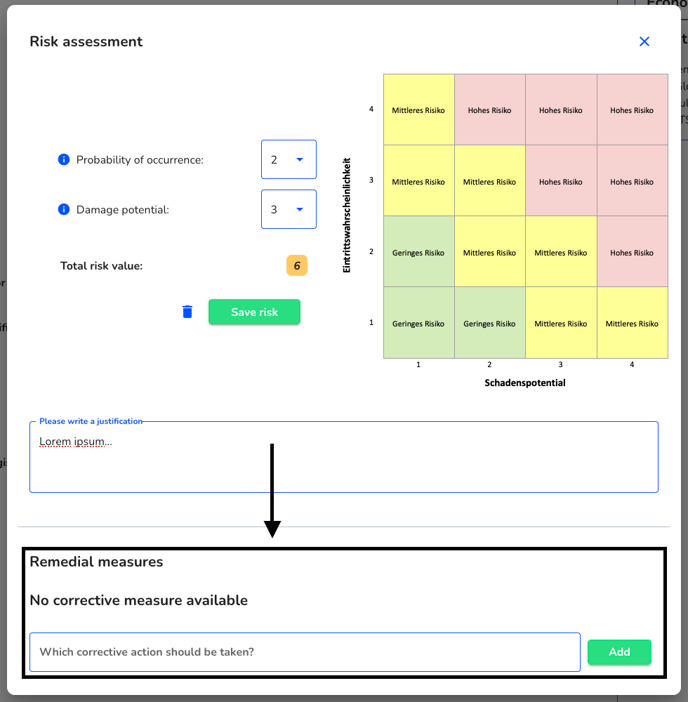
Click on “Add” to add this workaround.
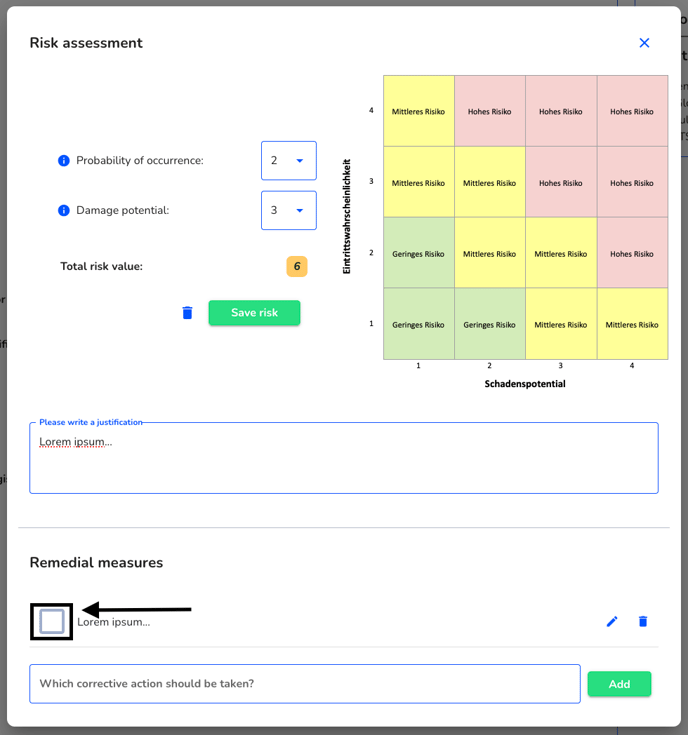
A corrective action can be marked as completed.
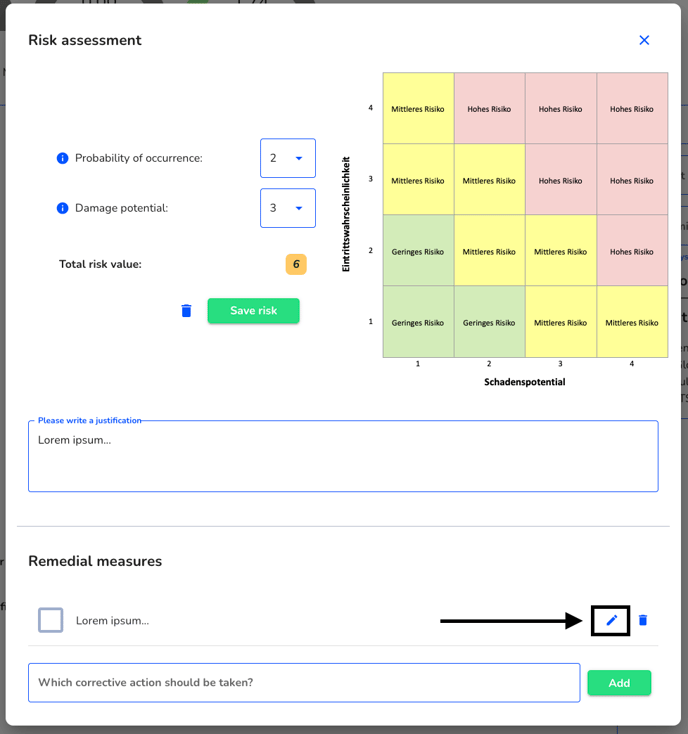
A corrective action can be processed.
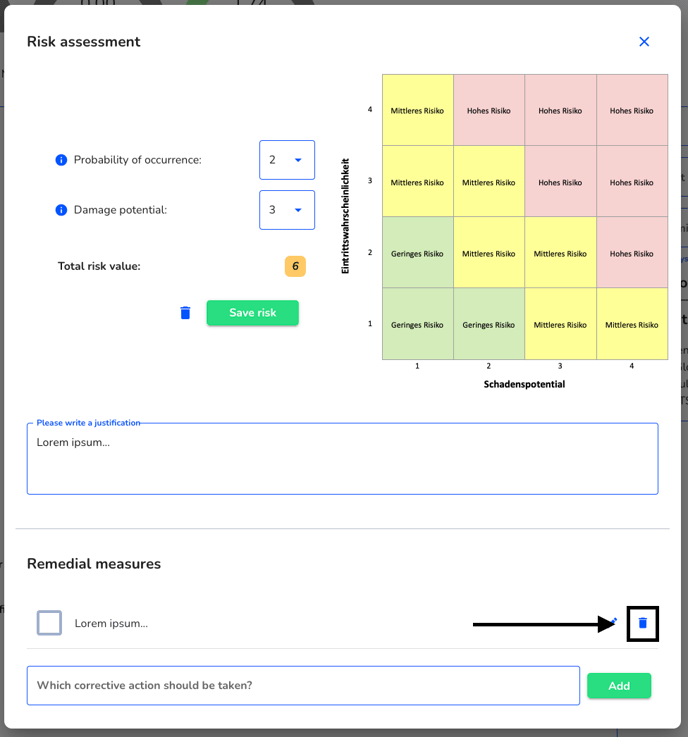
A corrective action can be deleted.
Change form
The form can be changed by clicking on the standard supplier form.
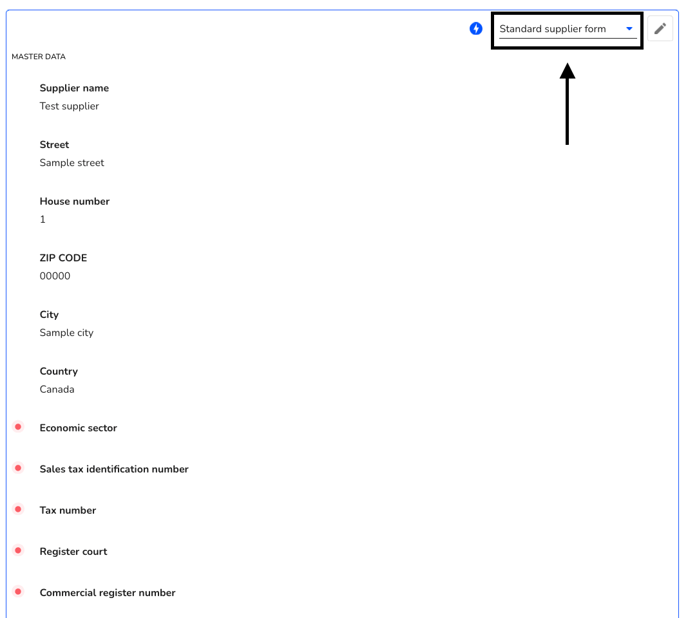
You can switch between the added forms.
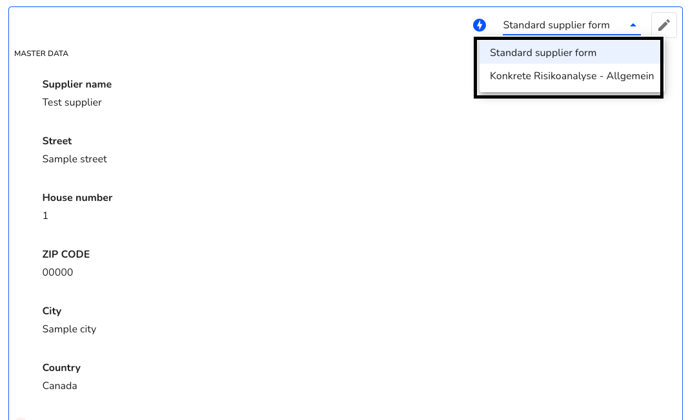
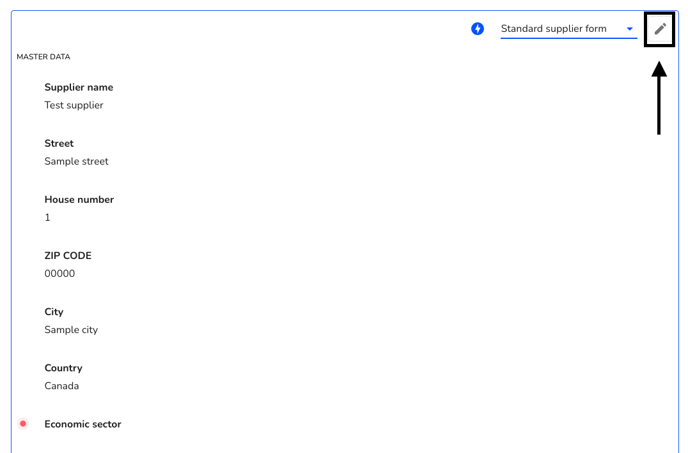
Switching between editing and display mode
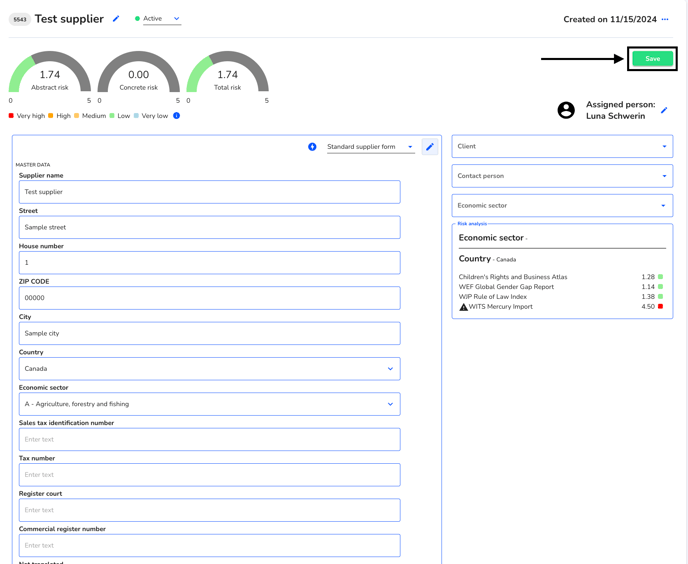
You can switch between edit mode and display mode for a selected form. To do this, click on the editing pencil.
The master data can be filled in.
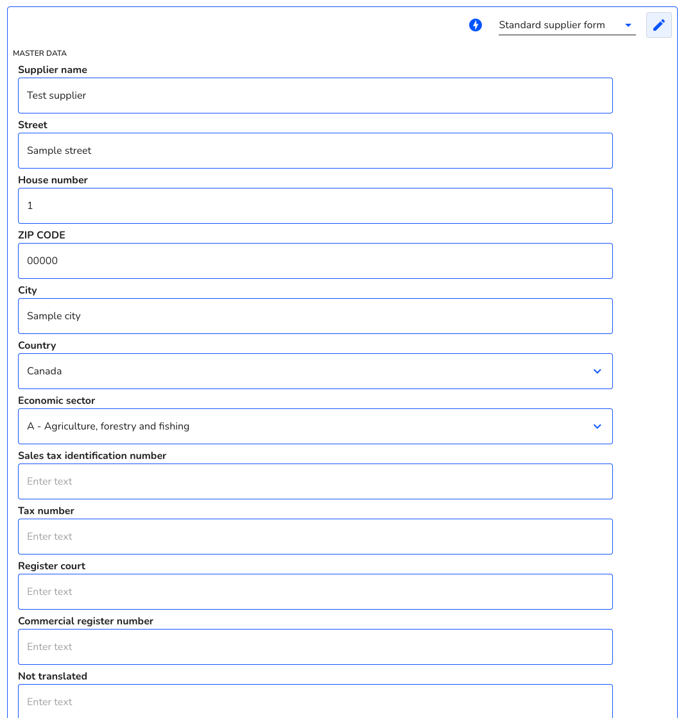
The changed master data must be saved by clicking on the Save button.
Store clients
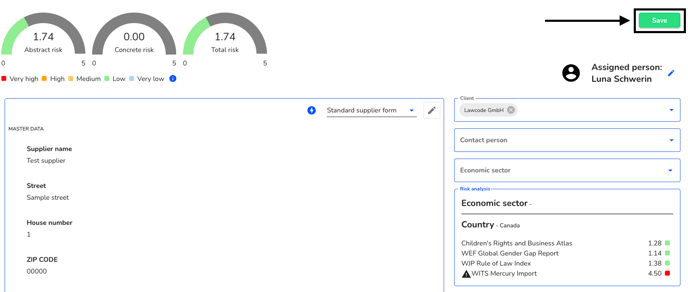
One or more clients can be assigned to each supplier.

Select the relevant clients.

The selection of clients must be confirmed by clicking on Save.
Store contact person
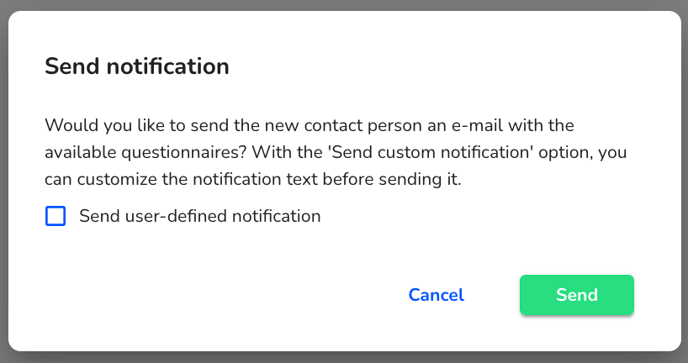
Various supplier contact persons can be assigned to each supplier. These contact persons can either be sent the master data form or other questionnaires for the specific risk analysis.

Select the contact person and click on Save.

After clicking on Save, you will be asked whether you want to send the new contact person an e-mail with the available questionnaires. Click either Cancel or Send. You can also send the questionnaires to the contact person at a later date.
Risk score
The risk score is calculated per supplier from the specified indices (for the selected economic sector and the specified country). This can be edited manually and the manual adjustment can be deleted again.
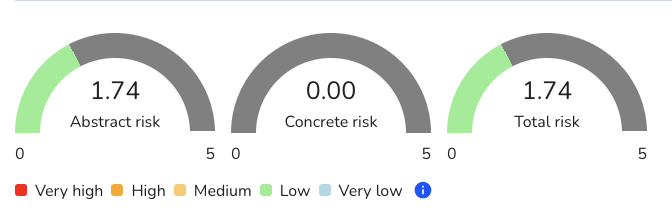
The risk score can be adjusted by clicking on the editing pencil.

You can enter numbers from 0 to 5 and enter a risk justification.
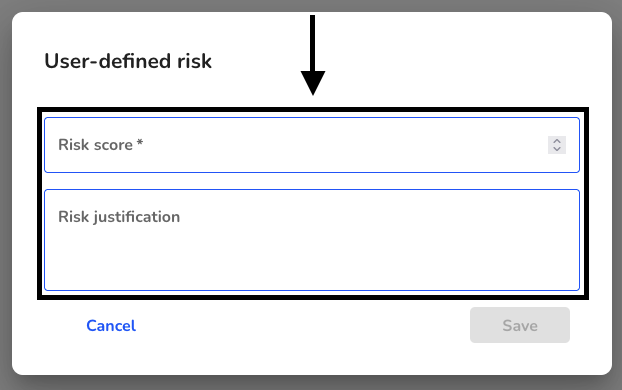
The user-defined risk must be confirmed by clicking on Save.
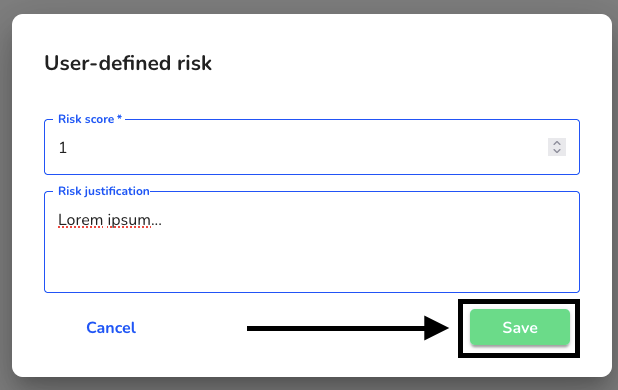
The manual change to the risk score must be confirmed by the supplier by clicking on Save.

The risk score has now been successfully updated.

The user-defined risk can be removed at any time by clicking on the total risk and on delete.
The deletion of the user-defined risk score must be confirmed by clicking on "Save".

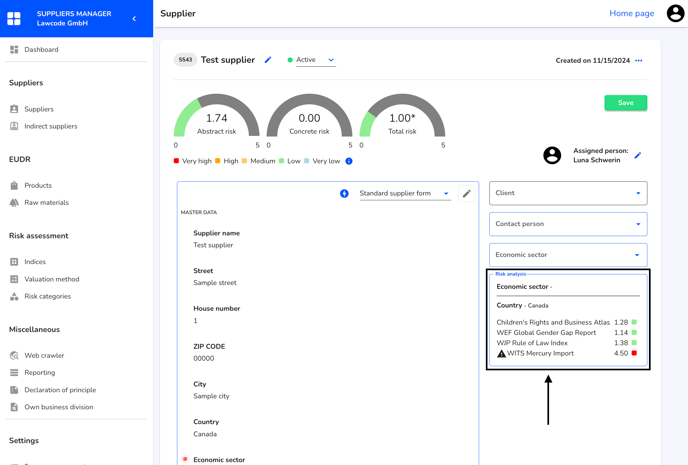
Risk analysis
In the risk analysis, the indicators are presented based on the economic sector and country. These can be categorized using risk categories. You can read more about this here.
The indices can be customized or imported in the Indices section. You can read more about this here.
With the help of the evaluation method, it is possible, for example, not to include certain indices in the risk analysis. You can read more about this here.
Add notes
Notes can be added to each supplier.
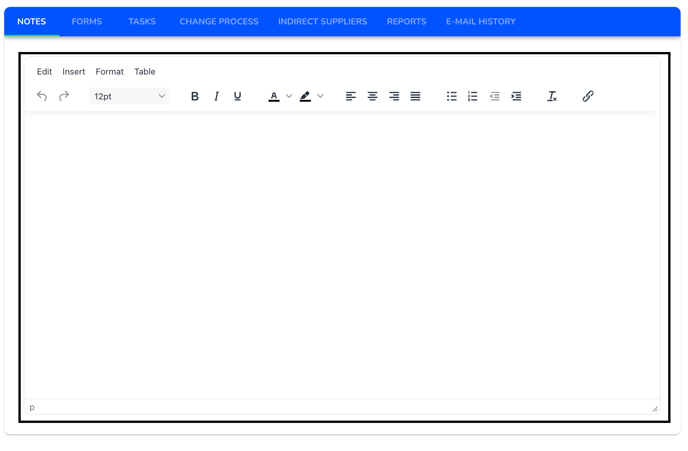
The notes must be saved by clicking on Save.
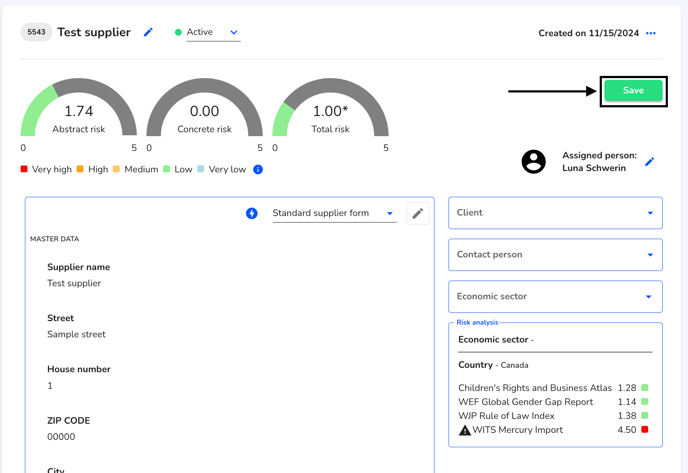
Assign supplier to a form, delete or send notification
Any number of forms can be assigned to a supplier. Master data entry is stored as standard. Additional forms could be used for the specific risk analysis, for example. To do this, navigate to the forms.

Add supplier form
There you can add a form to the supplier. To do this, click on "Add form".
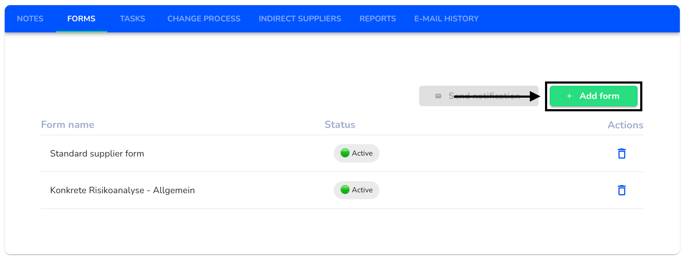
A list of all forms will open. You can click on as many as you like and confirm your selection by clicking on "Save".
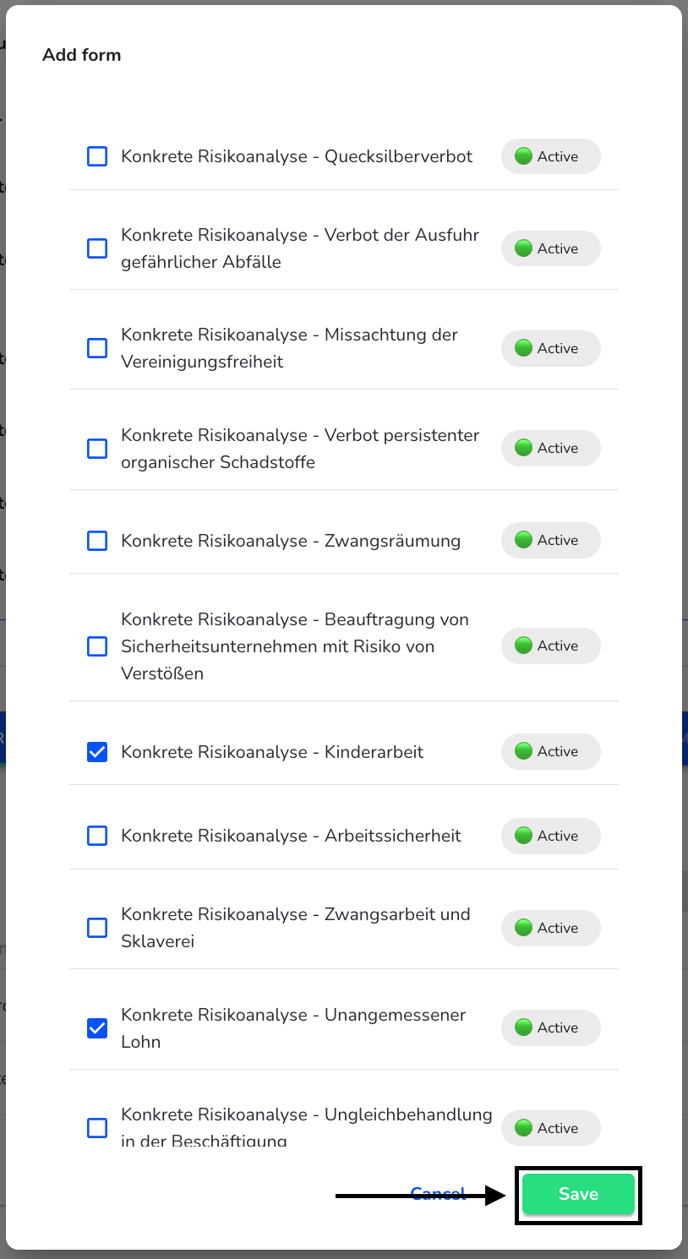
If a contact person is stored, a dialog appears. "Send" sends the standard notification via added forms to the contact persons stored at the supplier.

Send notification
Each form can be sent to the supplier's contact persons for the specific risk analysis, for example. To do this, click on the "Send notification" button.

If a contact person is stored, a dialog appears. "Send" sends the standard notification via added forms to the contact persons stored at the supplier. Click either Cancel or Send. You can also send the questionnaires to the contact person at a later date.

Delete supplier form
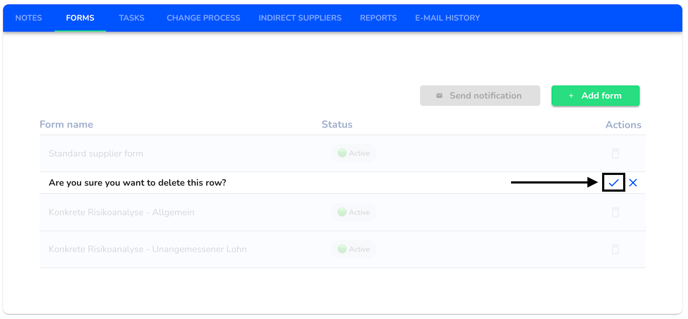
A form that has been assigned to a supplier can be deleted at any time. To do this, click on the recycle bin.
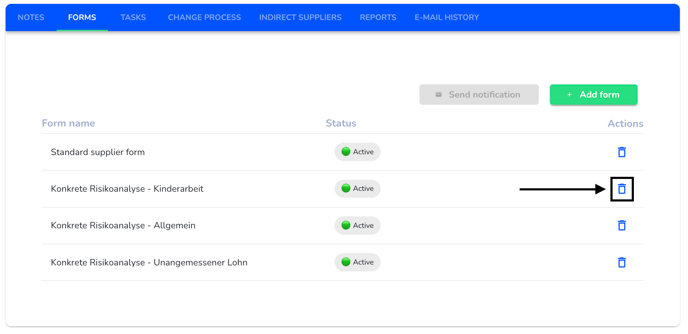
Click on the check mark next to the question whether you are sure.
Tasks at the supplier
Tasks can be created for a supplier, assigned to a person, given a due date and deleted. To do this, navigate to the tasks.

A task can be created by entering it in the "Which task should be completed?" field.

The task must be added by clicking on the "Add" button.

A task can be changed by clicking on the editing pen.

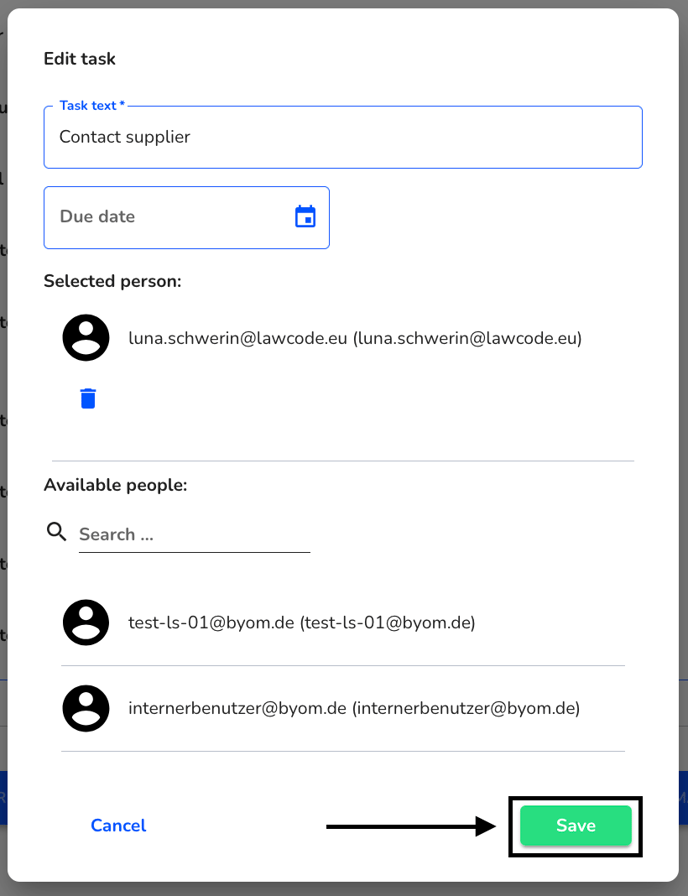
The task can be assigned to a person, the task can be given a due date or the text can be changed.
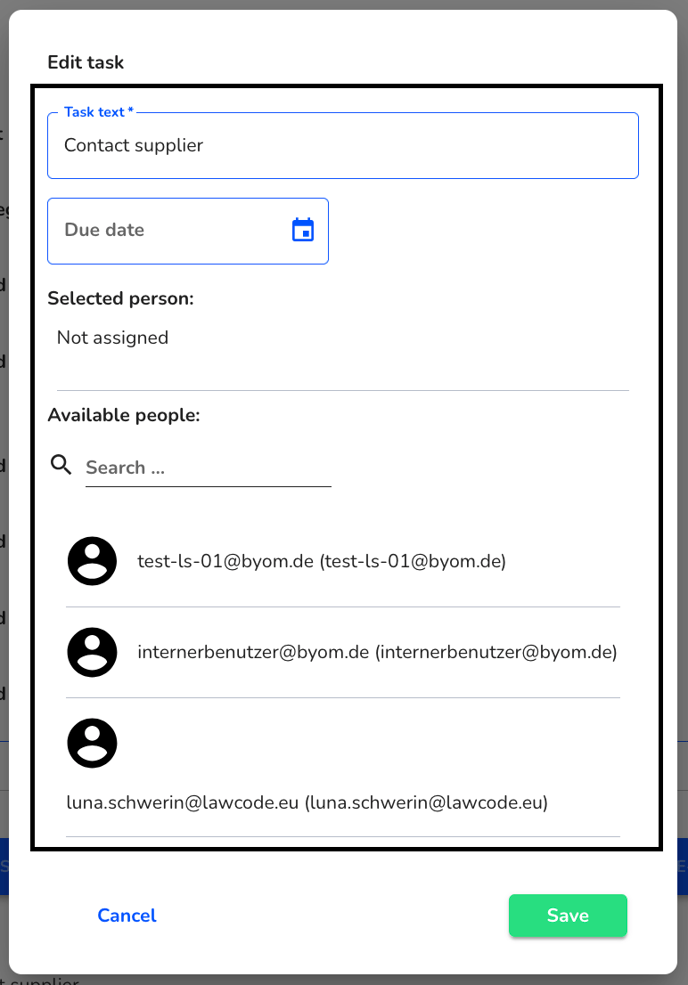
Click on "Save" to save the details.
A task can be marked as completed. To do this, click on the checkbox.

The task is now complete.

Tasks can also be deleted. To do this, click on the recycle bin.

Change process at the supplier
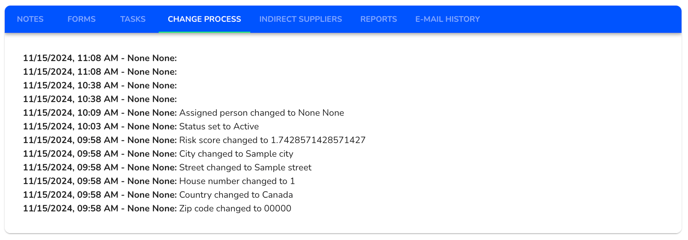
All important changes to a supplier are saved in an audit-proof manner. To do this, navigate to the change history.

There you can view the change history with all the important information.
Link indirect suppliers with supplier
Indirect suppliers can be assigned to each supplier. To do this, navigate to the indirect suppliers.

Click on "Indirect suppliers".

Search for a supplier or select one directly from the list.
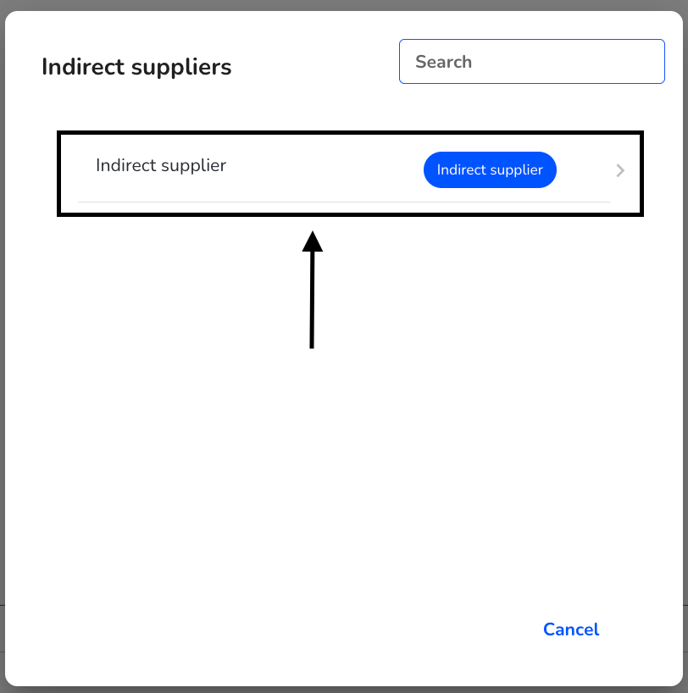
The supplier is now linked.

Each linked supplier can be deleted by clicking on the paier basket.

The deletion must be confirmed by clicking on the tick.

Link reports with suppliers
If you are using the LkSG module in parallel with the Hintbox / HinSchG module, you can easily assign a note to a supplier with just a few clicks. To do this, the supplier must be assigned to the report in the Hintbox.
To do this, navigate to the corresponding report that you want to link.
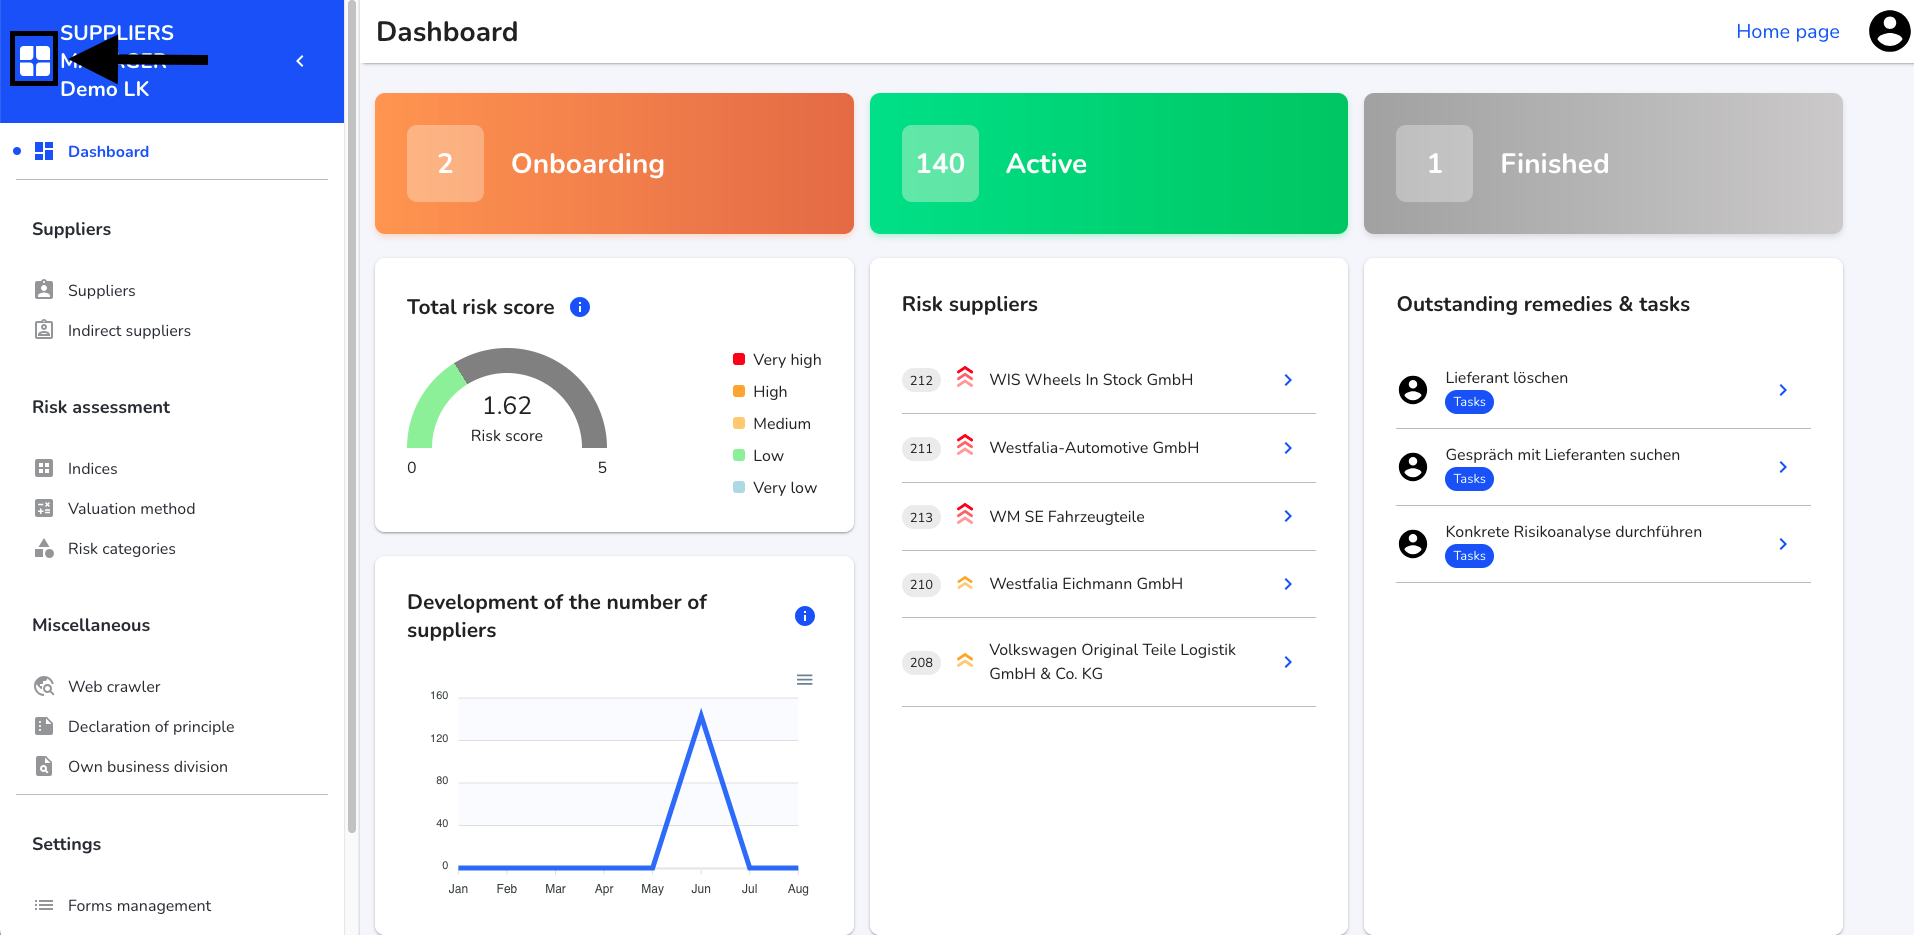
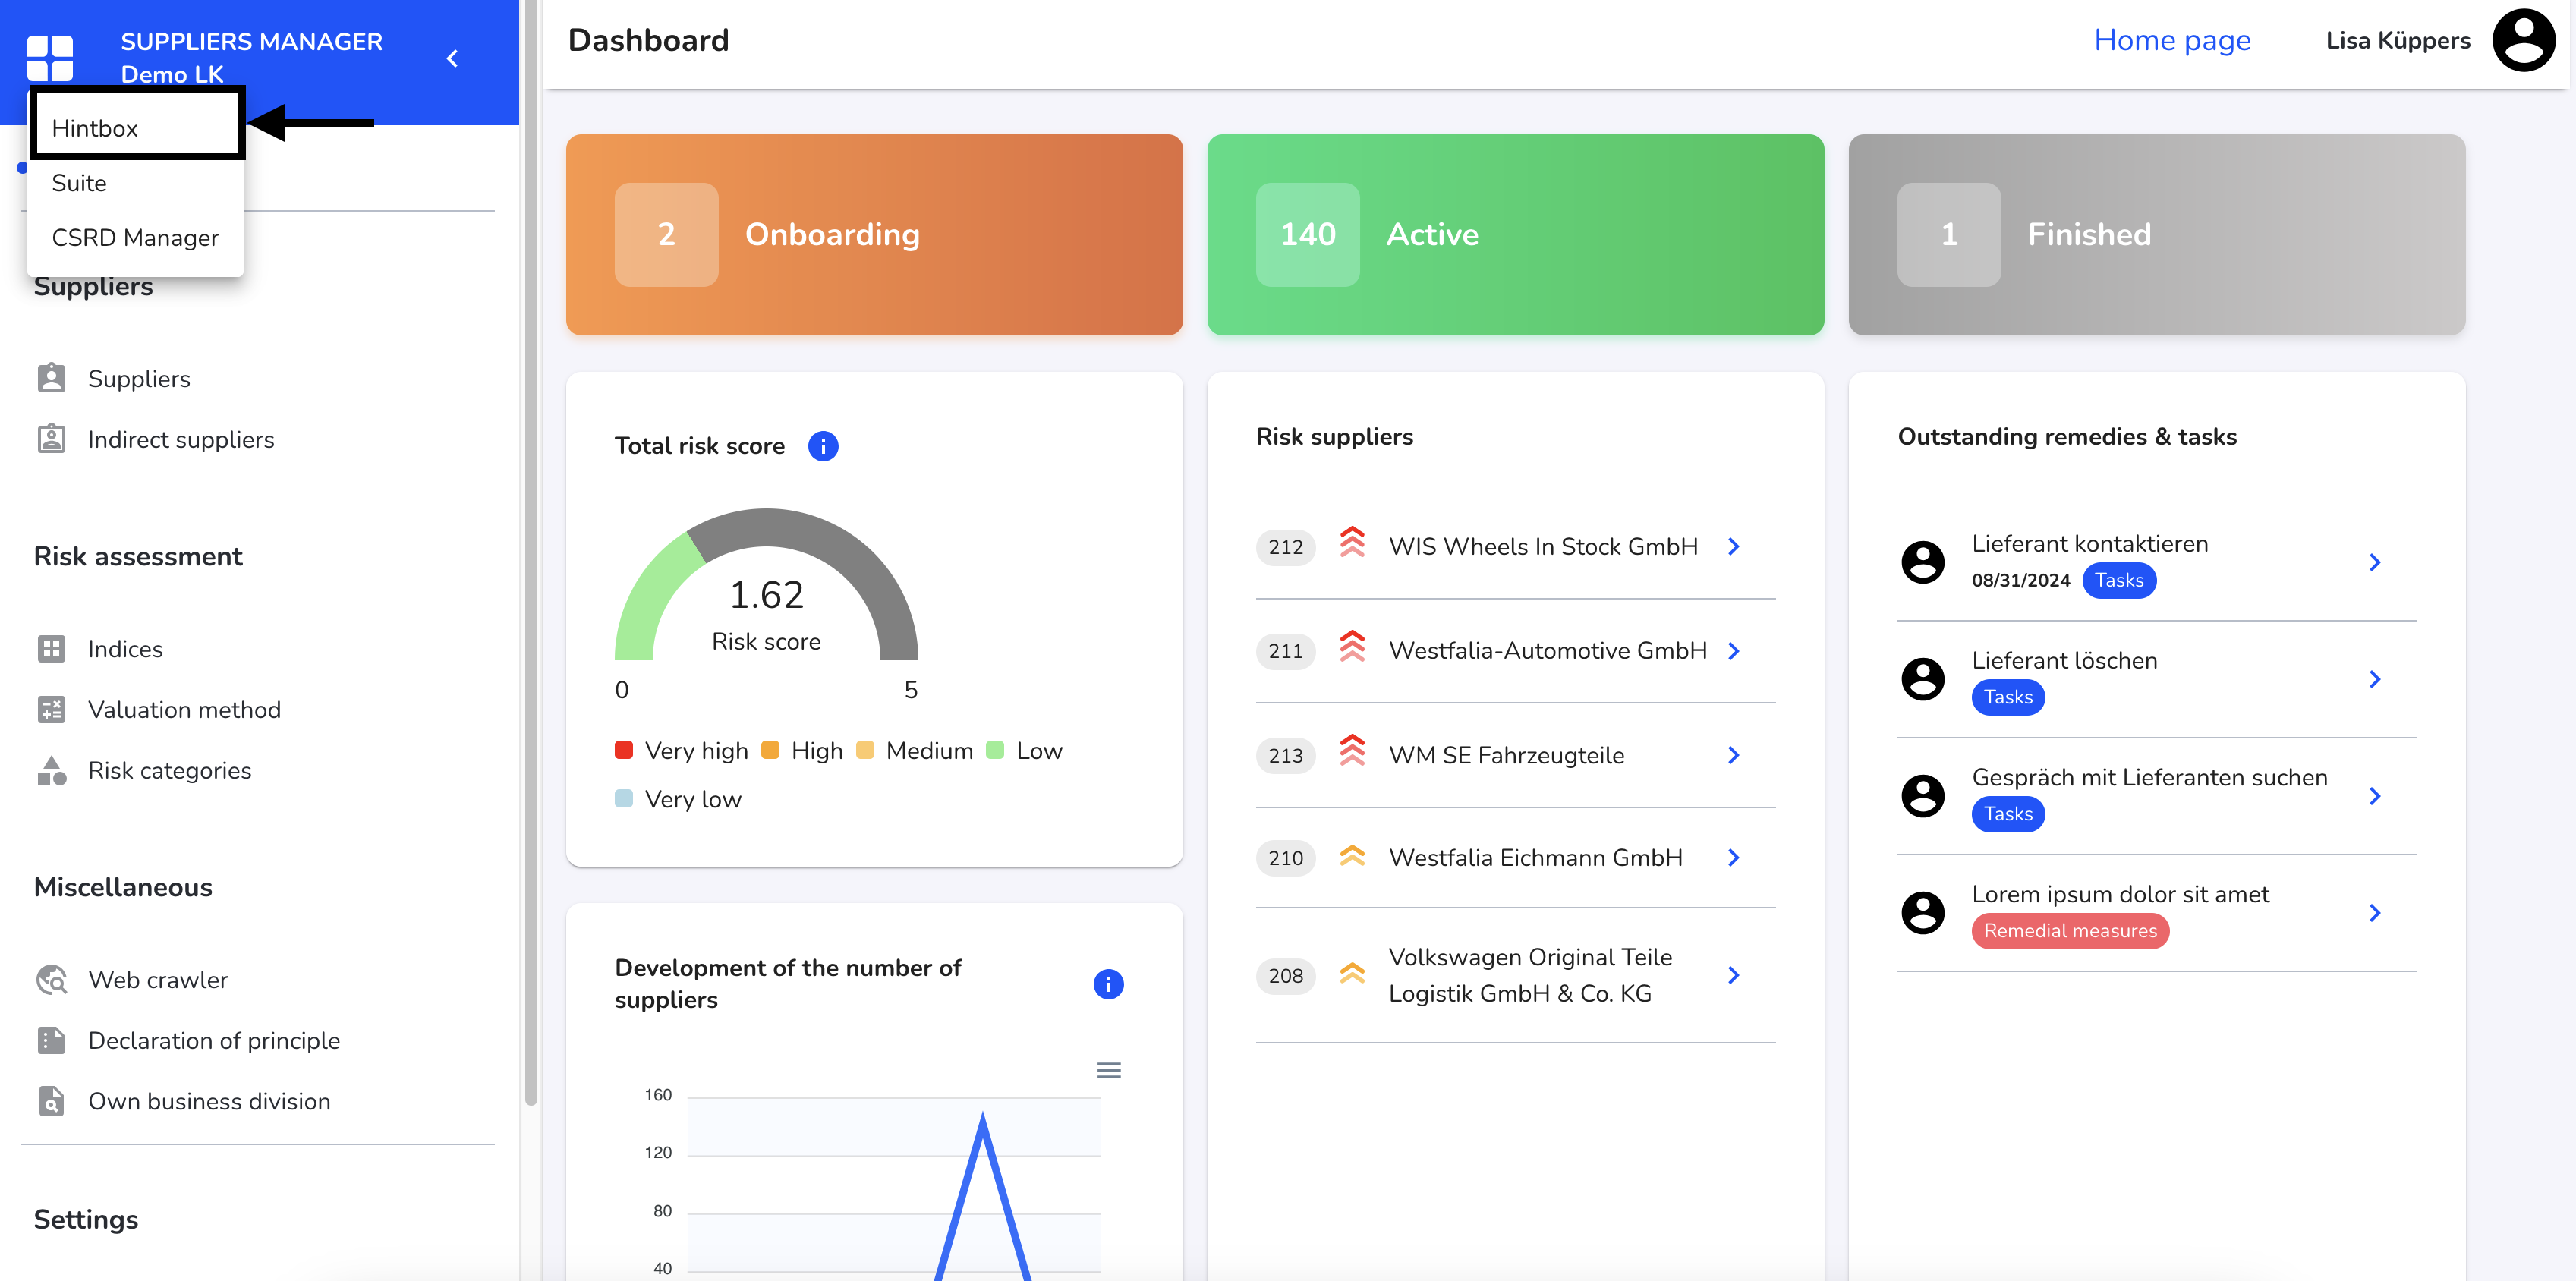
Select the hint box there.
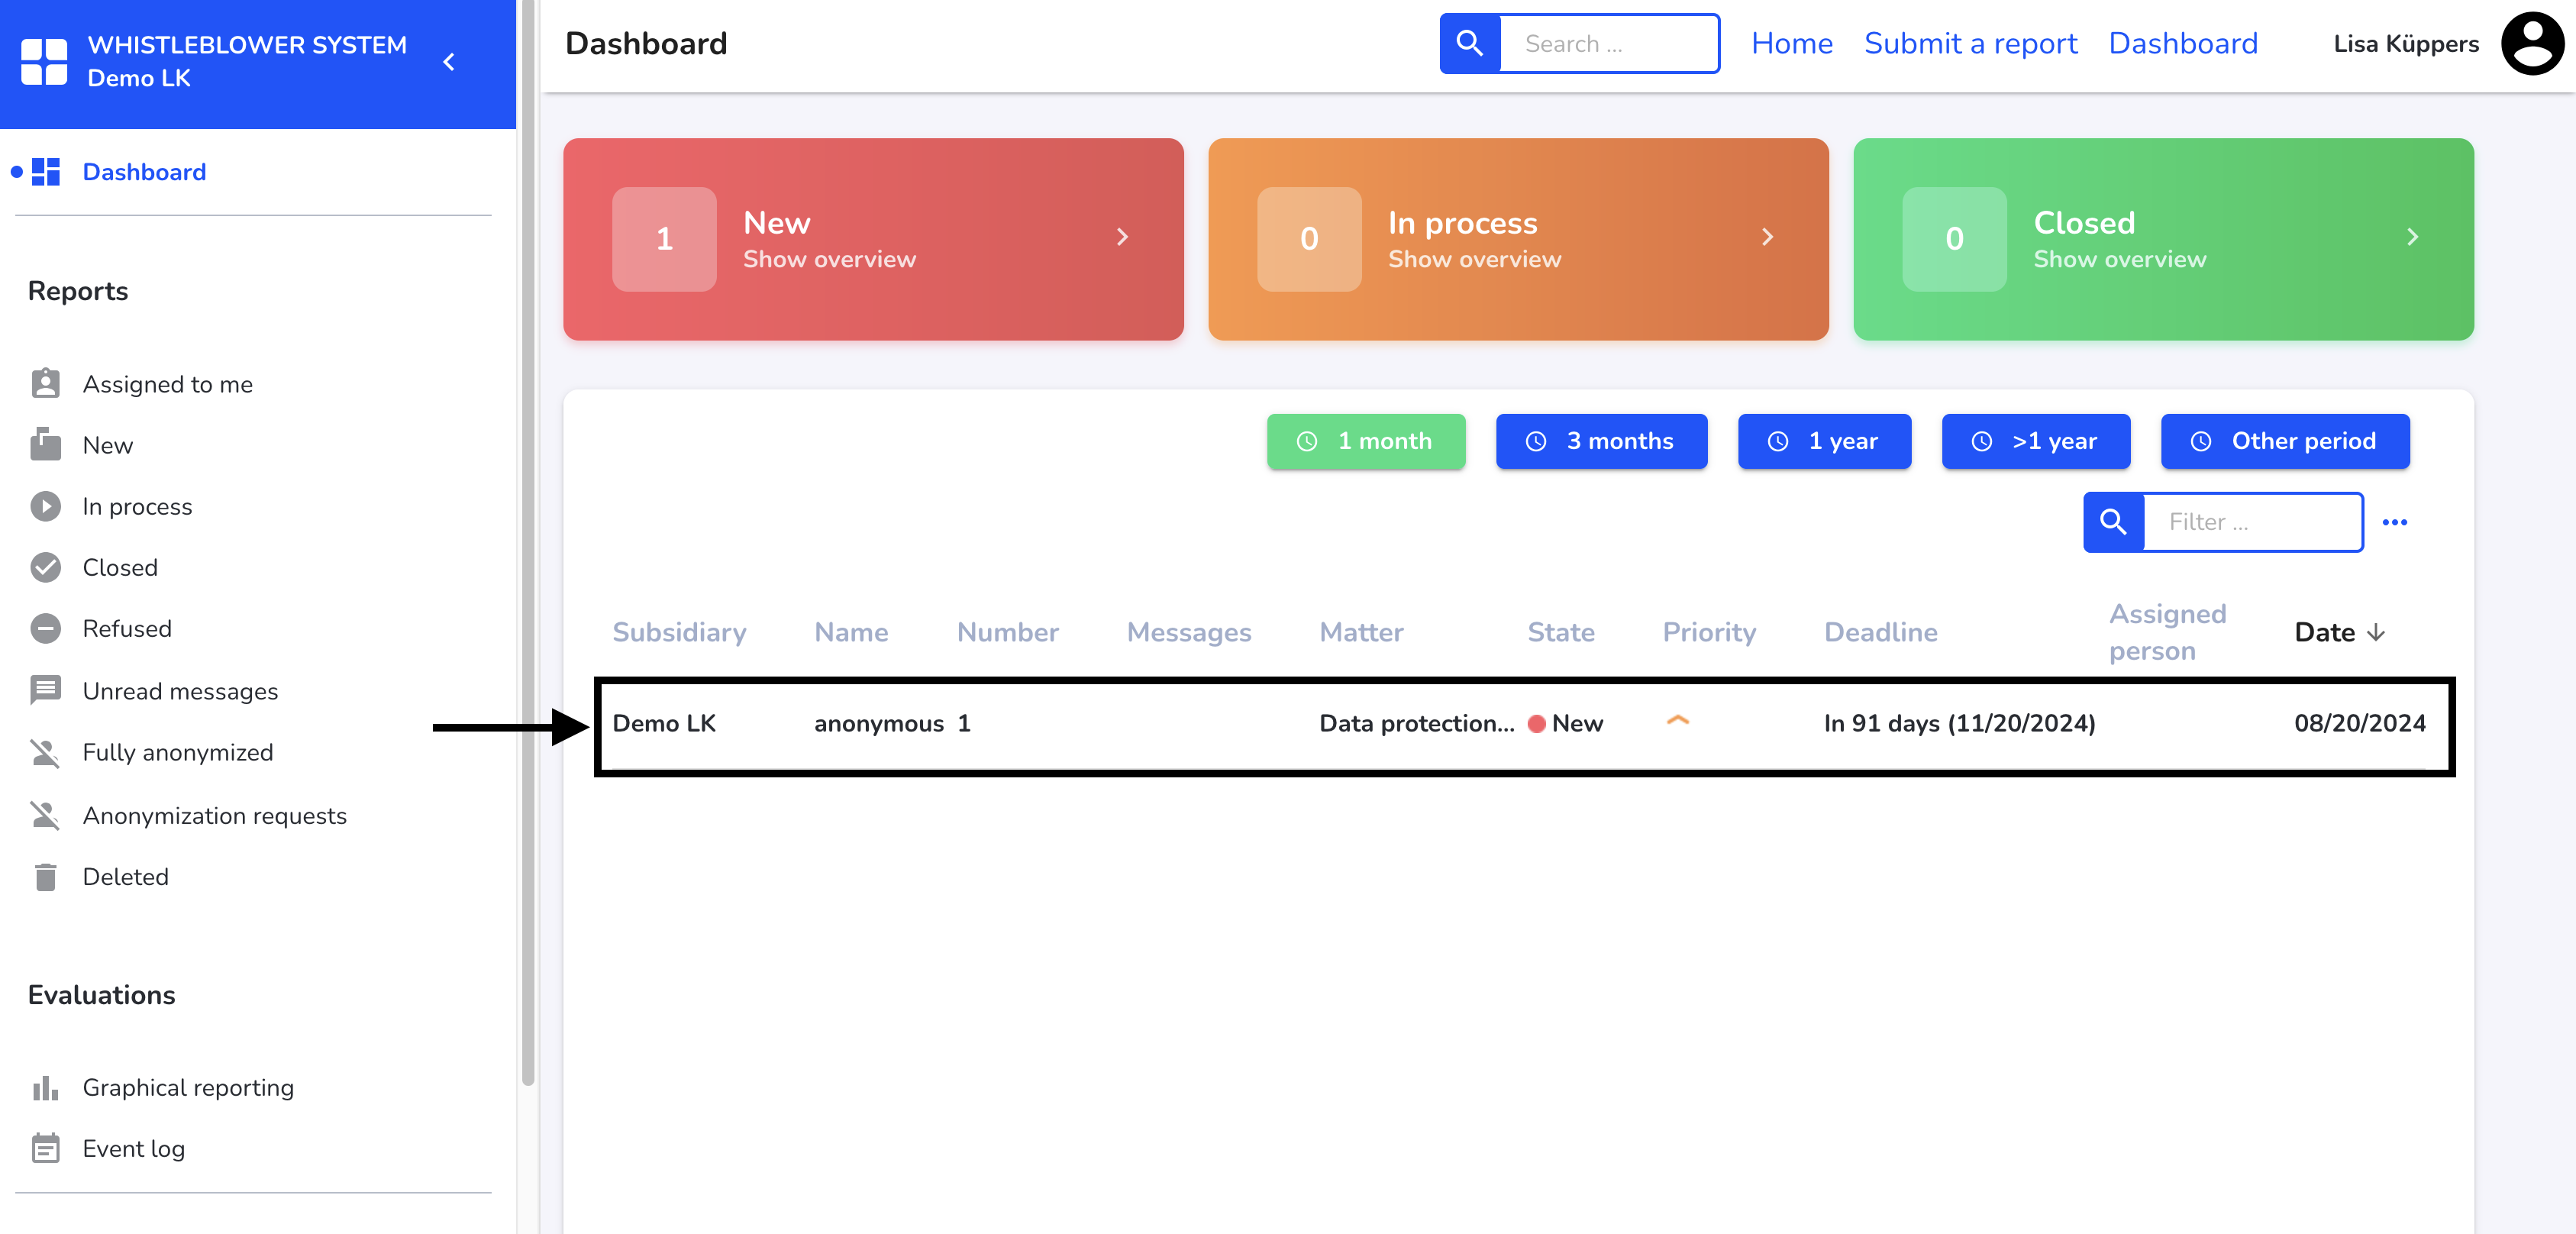
Open the report to be linked.
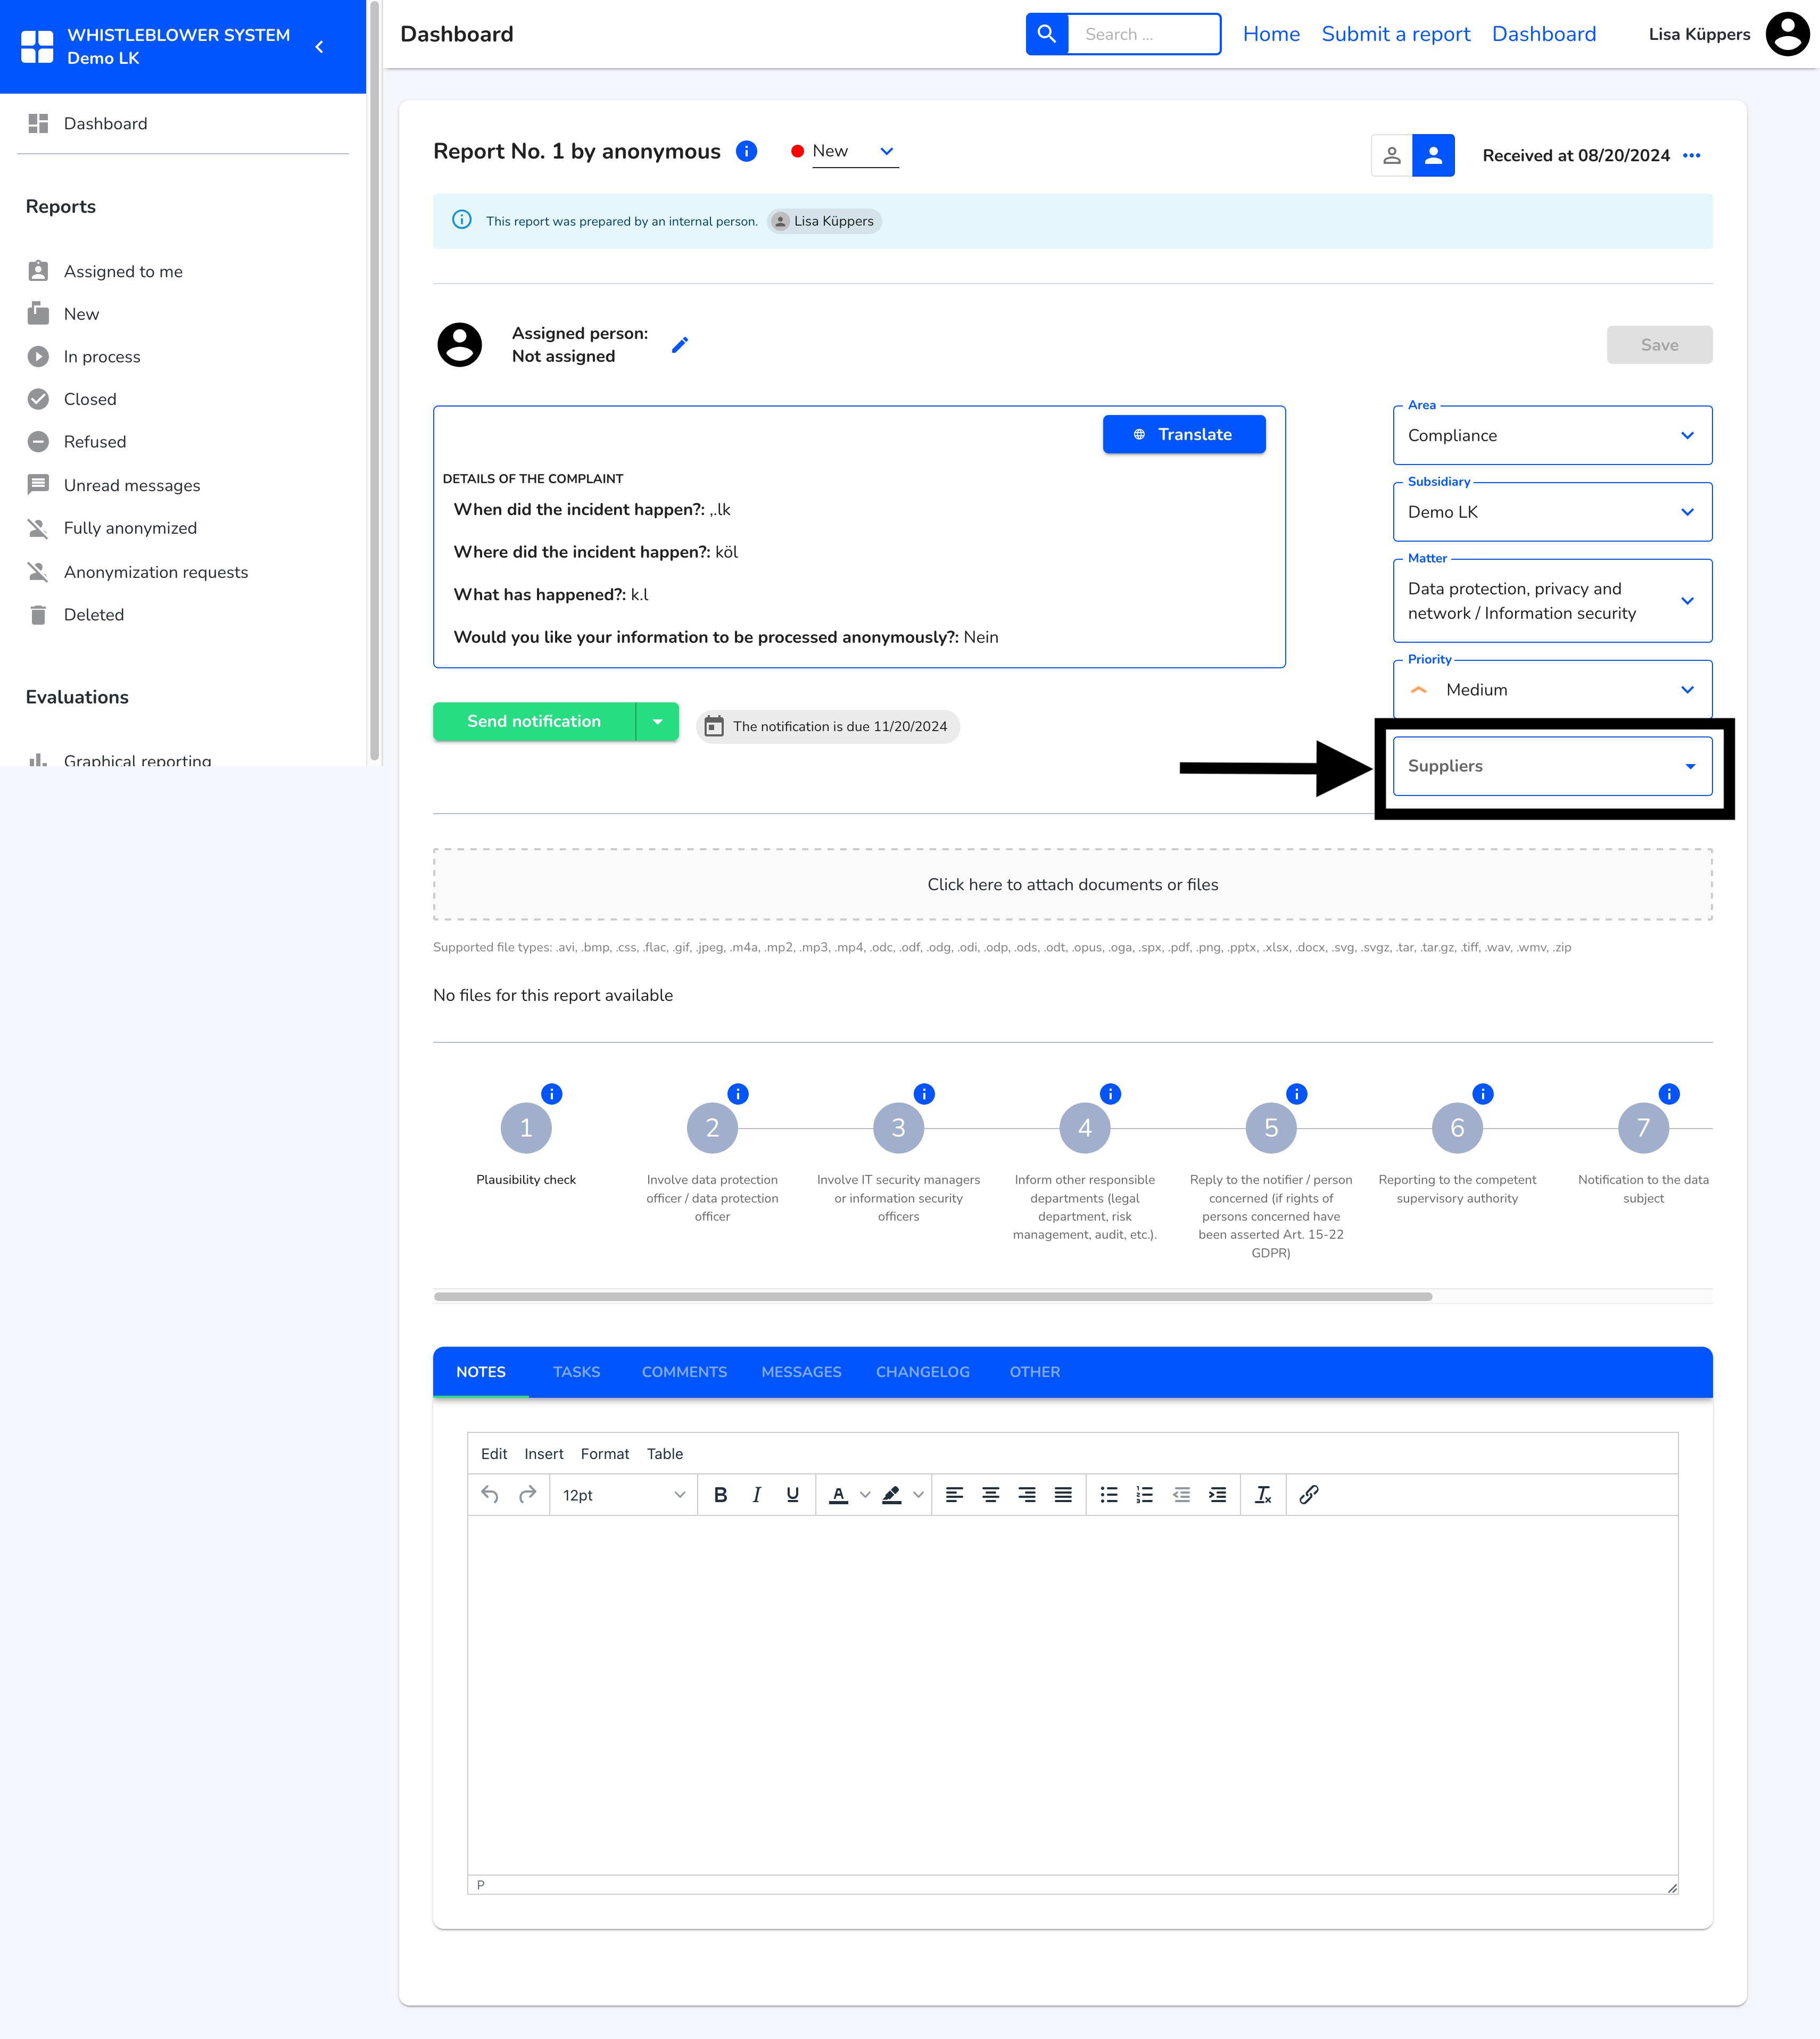
Click on the Suppliers field.
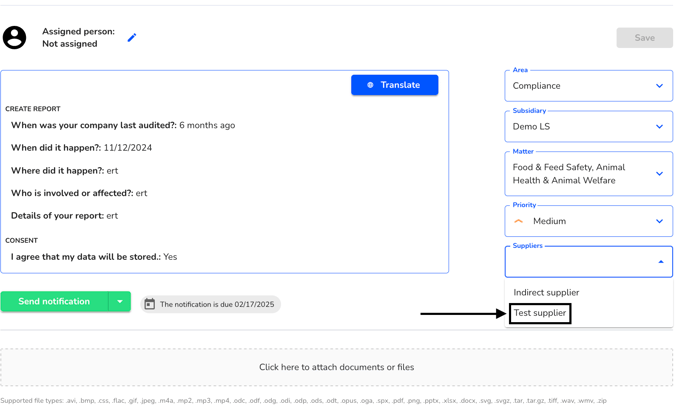
Select the supplier concerned. One or more suppliers can be selected.
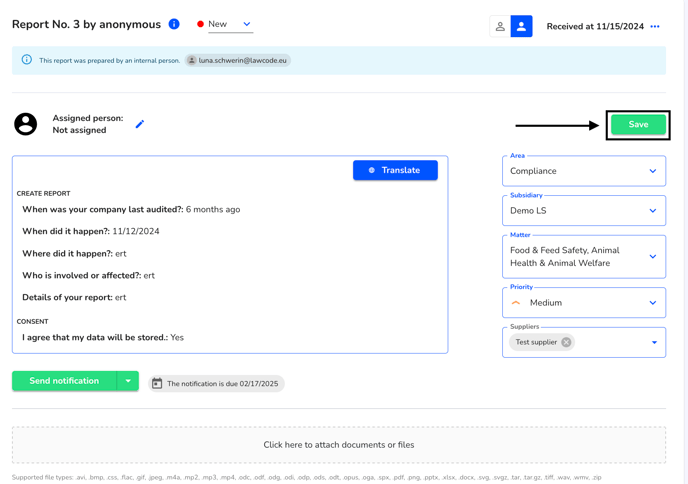
Save your changes.
To view the report in the Suppliers Manager, navigate to Reports.

A list of all reports appears. Clicking on the report takes you to the hint box.

E-Mail History
Click on E-Mail History.
In the E-Mail History you can see what notifications have been sent to users that are linked to the supplier.